Self Check-in Kiosk
The self check-in kiosk turns a tablet into an unattended check-in point. An attendee scans the QR code on their pass, confirms their name against a preview of the badge, and prints it. Printing the badge is what checks them in.
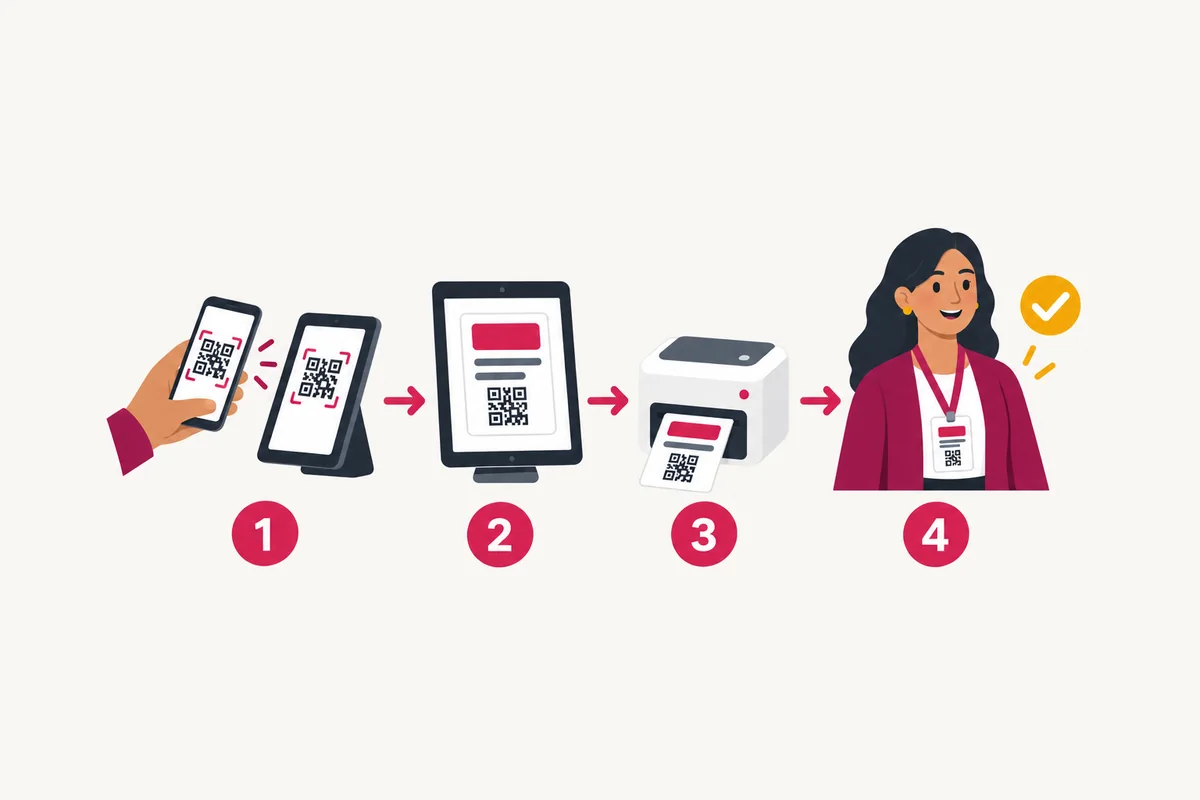
What the Kiosk Does
| Attendee situation | What the kiosk does |
|---|---|
| Confirmed, no badge yet | Shows a badge preview, prints it, and checks them in. |
| Already has a badge, not checked in today | Offers Check me in without printing. |
| Already checked in | Confirms they are all set. |
| Badge already printed, needs another | Sends them to the registration desk. |
| Registration pending, cancelled, or checked out | Sends them to the registration desk. |
| Not an event pass | Asks for the QR code on their pass. |
- Only a scanned pass is accepted, from the confirmation email, WhatsApp message, or the event app. The kiosk has no typed search, so attendees without their QR code go to a staffed desk.
- A pass prints once at a kiosk. If the badge didn't come out, tap Badge didn't print? Try again or scan the pass again at the same kiosk. Reprints work for five minutes after the first print, up to three prints in all. Later reprints are done at a staffed desk.
- Badges printed at a staffed desk count too: an attendee who already has one is only checked in.
- The kiosk shows only what the badge prints. It never shows an attendee's email or phone number.
- Kiosk check-ins appear in attendance with the method Kiosk and the kiosk's station name as the location.
- For events that allow multiple check-ins, an attendee with a badge can check in once each event day.
What You Need
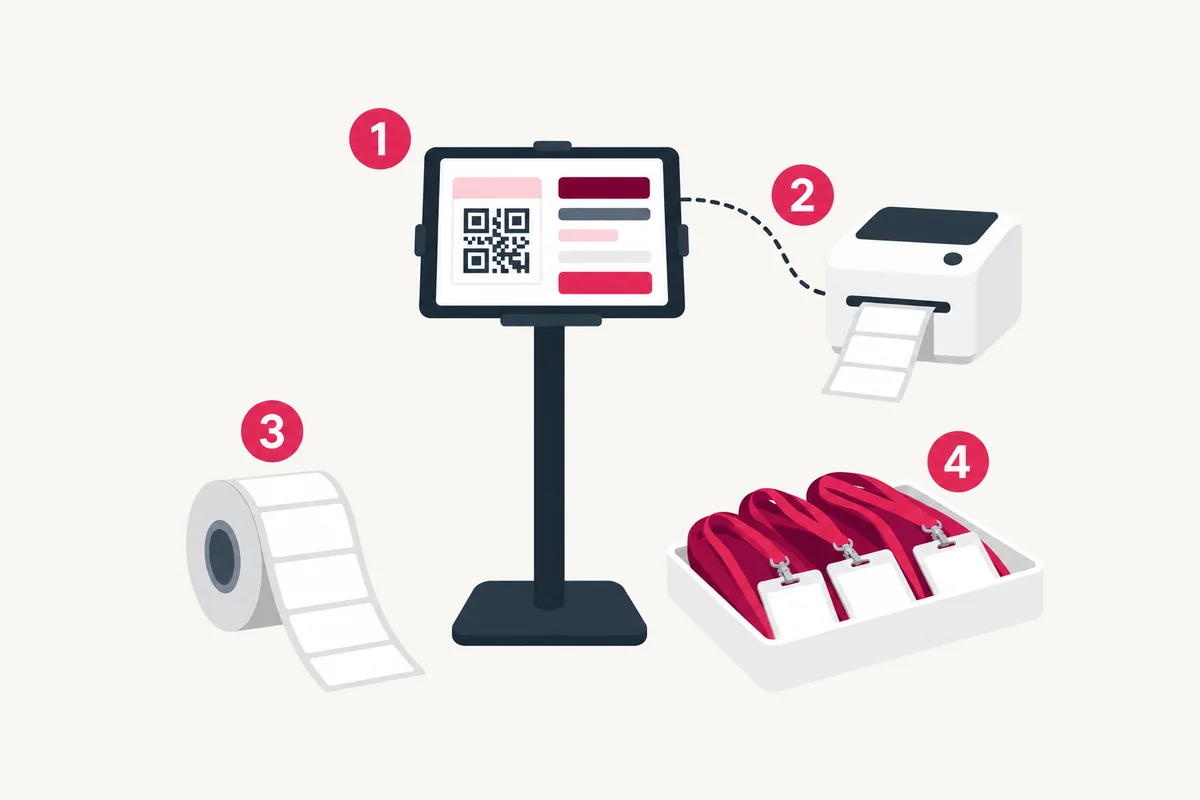
- An Android 8 or later tablet with a front camera, on a stand at a comfortable height.
- A Zebra thermal label printer in ZPL mode, connected by Bluetooth, USB, or network.
- Gap labels that match the badge size set in the event's advanced settings. The default is 75 × 50 mm.
- The Zinvos Kiosk Android app, which locks the tablet to the kiosk and prints straight to the printer.
The kiosk also works in a desktop browser for testing, printing through the browser's print dialog.
Set Up a Kiosk Tablet
- Install the Zinvos Kiosk app and allow the camera.
- Set the 6-digit tablet admin PIN. This PIN protects the app's printer setup on that tablet.
- In the app's tablet setup, choose the printer connection, detect its resolution (203 or 300 dpi), print the test label, and calibrate the labels.
- Open staff web setup in the app and sign in to the admin.
- Open Ops Portal, choose the event, then Self Check-in Kiosk.
- Choose Start kiosk on this device, give it a station name such as
Kiosk 1, and choose a 4 to 8 digit kiosk PIN for staff. - Back in the app's tablet setup, tap Start kiosk to lock the tablet.
Starting a kiosk signs that device out of the admin. The tablet keeps only a kiosk session for that event, which can scan, print, and check in, and nothing else.
Staff Menu
Hold the logo in the top-left corner of the kiosk for two seconds and enter the kiosk PIN. The menu shows the printer's status and how many badges the kiosk has printed, lets you switch cameras, and has Print a test badge and Exit kiosk mode. It closes itself after 90 seconds without a touch. Five wrong PINs lock the menu for a minute.
To reach the app's printer setup, tap the top-left corner five times within three seconds and enter the tablet admin PIN.
Running Kiosks
The Self Check-in Kiosk page in the Ops Portal lists the event's running kiosks with their station name, badges printed, and when each was last seen. Choose End to stop a kiosk remotely, for example if a tablet goes missing. The tablet stops accepting scans and shows a paused screen.
A kiosk stops working by itself after 14 days.
Before Doors Open
- Print a test badge from each kiosk's staff menu. It should fill exactly one label.
- Scan a real pass through to a printed badge, then scan the printed badge at a gate or attendance scanner.
- Open the printer cover and scan another pass. The kiosk should say the printer isn't ready without using up that attendee's print.
- Keep a staffed desk nearby for reprints and attendees without their QR code.